If you want to create music that moves people—whether you're scoring a film or composing a symphony—your virtual orchestra needs to feel alive.
One of the keys to achieving this is mastering articulations. With articulations, you can make your string section swell with legato beauty, or your brass section punch through with sharp staccato bursts. This is how you get from flat, robotic performances to something that sounds real.
So, let’s explore how you can use articulations and dynamic controls in Logic Pro to create vibrant and expressive performances.
Access Articulations via Smart Controls
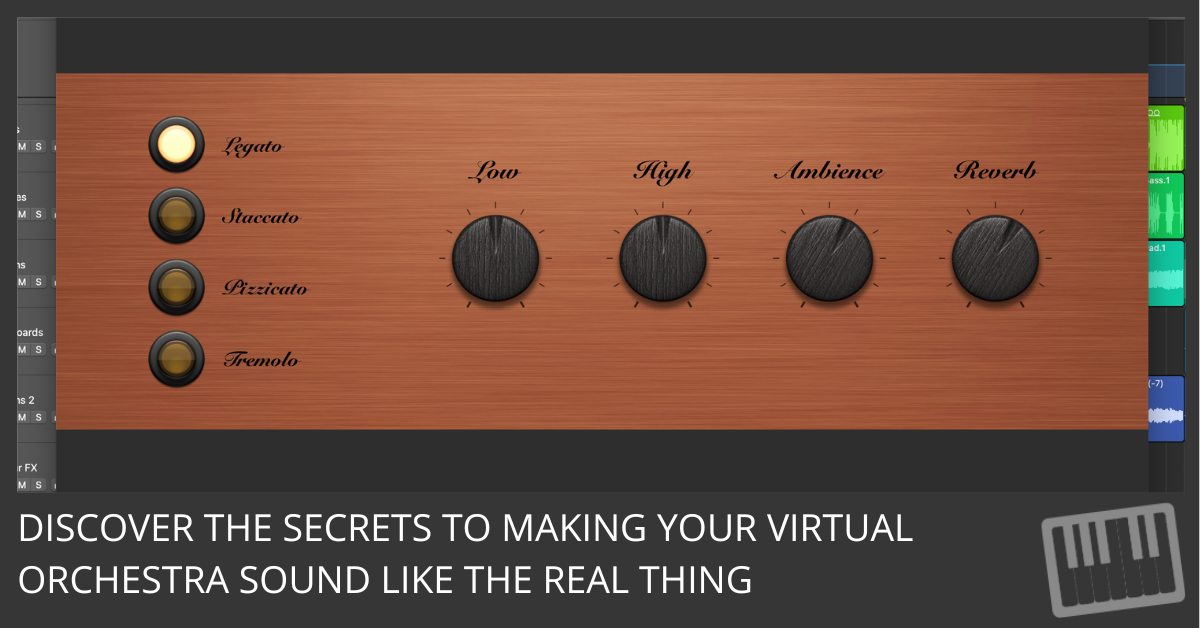
The first step in unlocking realistic performances is to access articulations through Logic Pro's Smart Controls. Smart Controls provides a clean, intuitive interface for switching between different articulation samples—think legato for smooth, connected notes or staccato for short, detached bursts.
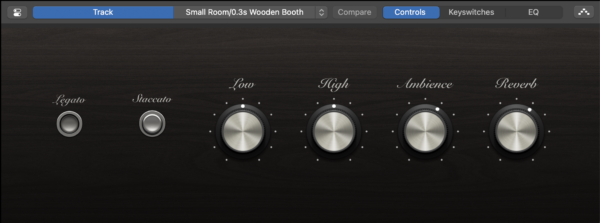
Here’s what to do next: Open your project in Logic Pro and select an Orchestral patch you want to customize. For instance, if you're working with a clarinet, select the clarinet track and press B on your keyboard to open Smart Controls.
In the Smart Controls panel, you'll see buttons labeled with common articulations like Legato and Staccato. Clicking these buttons changes the instrument's articulation in real-time, letting you quickly experiment with different playing styles. For a string section, try switching between Pizzicato and Tremolo to hear the dramatic shift in texture.
For example, if you're composing a delicate, emotional passage, you might want your strings to flow seamlessly, so Legato is the natural choice. But if you need your brass to add rhythmic drive to a more aggressive section, switch to Staccato for crisp, punchy notes. You can hear the difference immediately, which helps you make fast decisions about what works and what doesn’t.

Assign to MIDI Controllers
Now that you’ve got the basics of switching articulations, let’s make things even easier. One of the best ways to streamline your workflow is by assigning these articulation switches to your MIDI controller. This means you won’t have to reach for your mouse every time you want to change how your instrument plays—just hit a button or move a slider on your controller, and you're good to go.
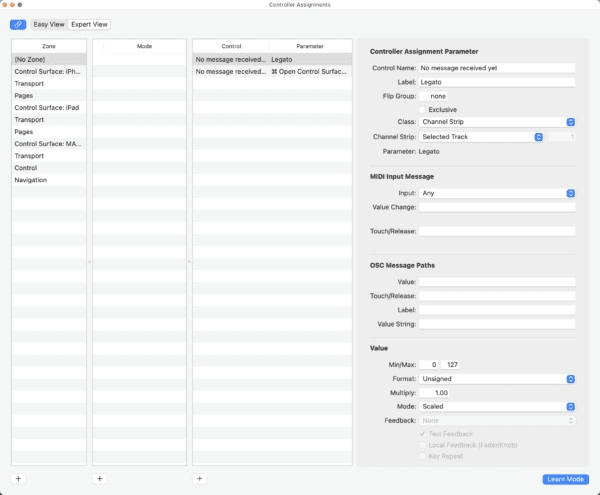
Here’s how to do it: In Logic Pro, select the instrument track you want to control. Then, head to Logic Pro > Control Surfaces > Learn Assignment. This will open up the Controller Assignments window. Now, all you need to do is select the Smart Control you want to assign, then move the button, knob, or slider on your MIDI controller. Logic Pro will automatically map that control to the articulation.
Imagine this: You're conducting your virtual orchestra, and your violins need to switch from Legato (bowed) to Pizzicato (plucked) in the middle of a phrase. With the articulation already assigned to a button on your MIDI controller, you can make that switch instantly while keeping your focus on the music. No need to stop and click around—just play.
This setup becomes a massive time-saver, especially if you're performing live or trying to capture a realistic take without constantly stopping to fiddle with settings.

Customizing Your Own Articulations
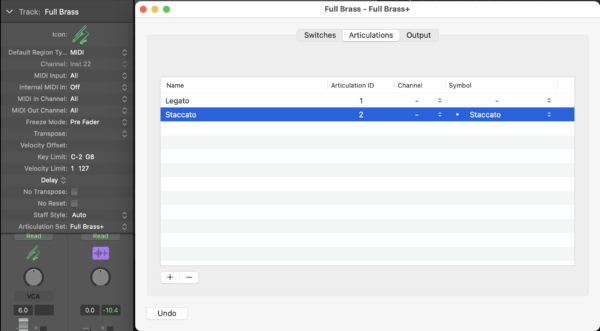
Want to go a step further? Logic Pro also lets you customize and create your own articulations. If you need a specific combination of dynamics and playing styles not already included in the Smart Controls, you can make a custom articulation set to match your needs.
To do this, select your instrument track and go to the Track Inspector. From the Articulation Set pop-up menu, choose Edit. Here, you can build new articulations from scratch, combining different playing styles and velocity responses. Once you’ve built your custom articulation, save it, and it’ll be ready to use across any project.
This level of customization gives you incredible flexibility, especially if you're working on complex projects with highly specific requirements. Whether you're trying to match the exact playing style of a specific performer or you want to experiment with unique combinations, Logic Pro gives you the tools to make it happen.

Conclusion
Mastering articulations in Logic Pro is all about making your performances sound as human as possible. You can breathe life into your virtual orchestra by learning how to access articulations through Smart Controls and assign them to your MIDI controller.
So go ahead—take the time to explore how different articulations affect the feel of your tracks. Assign those controls to your MIDI controller for even faster performance, and start experimenting with velocity and expression to shape your sound. It might seem like a small detail, but it’s the difference between a track that feels flat and one that moves people.

HI – some great tips here. Unfortunately for me, when I press ‘B’, I do not have the ‘legato’ and ‘stacatto’ buttons. Perhaps I’m using an older version of Logic (10.07.09)?
Thanks
Darren
The Smart Controls depend on the instrument track you have selected. If you stick to the Orchestral patches, you should see a couple of articulation buttons. If you need more help, shoot me an email with a screenshot.
Aha – now I feel stupid lol. Thanks Graham much appreciated
haha no worries! There are no stupid questions when it comes to Logic Pro.