
You don't need to drop hundreds of dollars on third-party plugins to make professional-sounding music in Logic Pro. You already own a goldmine.
Logic Pro ships with a toolkit that competes head-to-head with the most popular paid plugins on the market: compressors, EQs, reverbs, delays, and mastering tools, with no subscriptions, dongles, or extra installs. You just have to use them right.
This article shows you which Logic Pro stock plugins punch above their weight, and how to put them to work in your sessions starting today.
Channel EQ vs. FabFilter Pro-Q 4
Start with the bread and butter: EQ.
Plenty of producers throw money at FabFilter Pro-Q 4 for its sleek UI and spectral dynamics. Logic's Channel EQ is criminally underrated by comparison, and it's both precise and fast.
Try this on a vocal track:
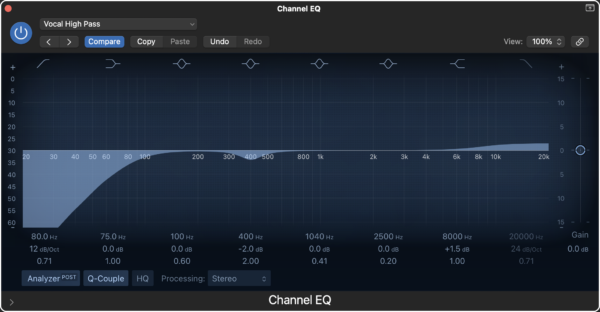
- Load Channel EQ on your vocal track.
- Open the analyzer. Turn on “Post” to see what’s happening after processing.
- Use the high-pass filter to cut everything below 80 Hz.
- Sweep with a narrow Q to find and kill boxy frequencies (usually around 300–500 Hz).
- Add a gentle boost around 8–10 kHz for air.
For quick starting points:
- Kick Drum EQ Preset: Cut at 300 Hz, boost at 60–80 Hz, slight dip at 600 Hz.
- Snare: Cut sub-100 Hz, boost 1–2 kHz, air at 8 kHz.
This stock EQ does more than most people expect. For a deeper set of techniques, including the mid-side mode that most producers never touch, see our guide to Logic Pro EQ tricks.
Logic Pro Plugins: How To Sculpt Frequencies With Channel EQ
Compressor vs. Waves SSL G or UAD 1176
Logic’s Compressor plugin looks plain, but under the hood, it's a monster.
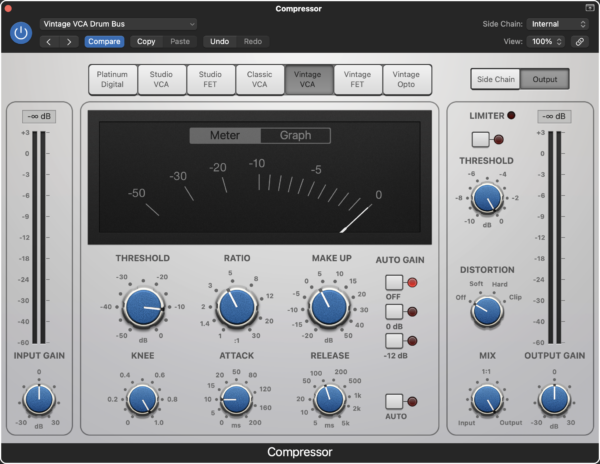
It models seven classic compressor types, so pick the right one for the job:
- Platinum Digital = Clean, surgical
- Vintage VCA = SSL-style glue
- Vintage FET = 1176 aggression
- Vintage Opto = LA-2A smoothness
Three steps to get started:
- Drop it on your drum bus.
- Choose “Vintage VCA.”
- Dial in: Ratio 4:1, Attack 10ms, Release 100ms, and set Threshold until you get 3–6 dB gain reduction.
For snappy vocals, choose "Vintage FET" and slam it. For transparent leveling on acoustic guitar, choose "Platinum Digital" and back off the ratio.
This covers the same ground as Waves or UAD models once you learn to drive it.
4 Essential Compression Settings for Beginners: A Breakdown of Attack and Release Settings
ChromaVerb vs. ValhallaRoom
Valhalla plugins are great, but ChromaVerb is right there begging for your attention. It's lush and musical, with more sound design potential than you probably realize.
To get started:
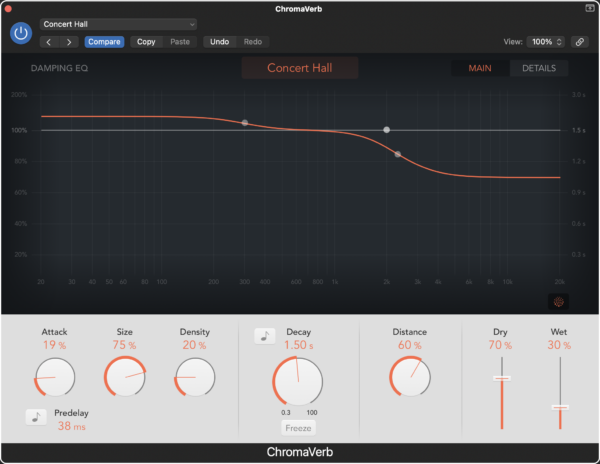
- Load ChromaVerb on a send (Bus 1).
- Choose “Concert Hall” or “Smooth Space”.
- Set Pre-Delay to 20–40ms for vocals (keeps the reverb from muddying the dry signal).
- Adjust the Decay Time (1.5 seconds is a good start for vocals).
- Dial in the Dry/Wet mix or control it on the bus fader.
For added flavor:
- Use the built-in EQ curve to cut out mud below 200 Hz.
- Automate the Mix or Decay for dynamic movement.
For synth pads, crank the decay and go full "Cavernous." For short reverb sounds, try "Small Ambience" with a low decay and tight damping.
Introducing the Revolutionary ChromaVerb: A Detailed Review and Guide
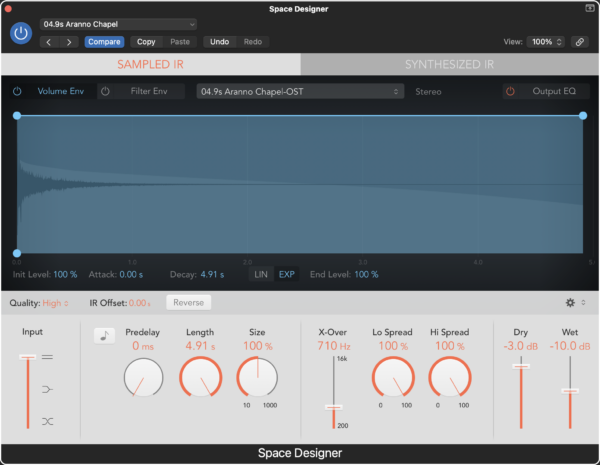
Space Designer vs. Altiverb
Altiverb is the industry standard for convolution reverb, and yes, it's stellar. But Space Designer is free in Logic, and it's damn close.
To place your sounds in real spaces:
- Add Space Designer to a send.
- Click the IR Sample pop-up menu > Load IR.
- Choose “Large Spaces > Halls > Aranno Chapel” or another real-world space.
- Adjust the Wet Level to taste.
- Use the envelope to shorten or shape the tail.
Bonus: You can import your own impulse responses. Record your bathroom, clap once, and suddenly your snare is bouncing off tile.
One combo worth trying:
- Use Space Designer for realistic instrument placement.
- Use ChromaVerb for stylized space and tone sculpting.
Match EQ vs. iZotope Ozone EQ Match
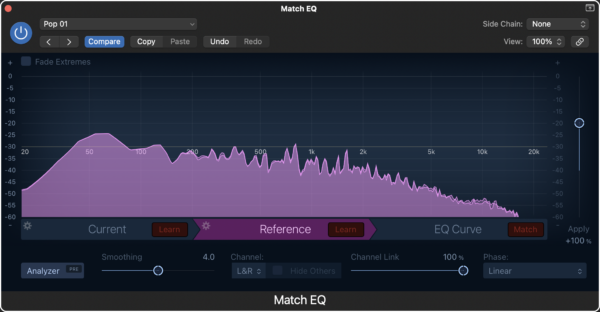
Match EQ is one of Logic's best-kept secrets. You can literally steal the tonal fingerprint of any song.
Say you love the mix of a Deadmau5 track:
- Drop the reference track onto a new audio track.
- Solo it and load Match EQ.
- Use the 'Learn' function for both the 'Current' (instrumental) and 'Reference' (vocal) sections within the Match EQ. This process allows Match EQ to understand which frequencies are prominent in your vocal track.
- After the learning phase, use the 'Match' feature within the plugin. Match EQ will create a frequency curve on the instrumental that mirrors the vocal's spectrum, identifying which frequencies need to be adjusted to make space for the vocals.
Trust the spectrum here as much as your ears. And to get surgical, manually edit the matched curve to dial it in.
Integrating Vocals Seamlessly into Your Mix with Logic Pro's Match EQ: A Step-By-Step Guide
Phat FX vs. Soundtoys Decapitator / RC-20
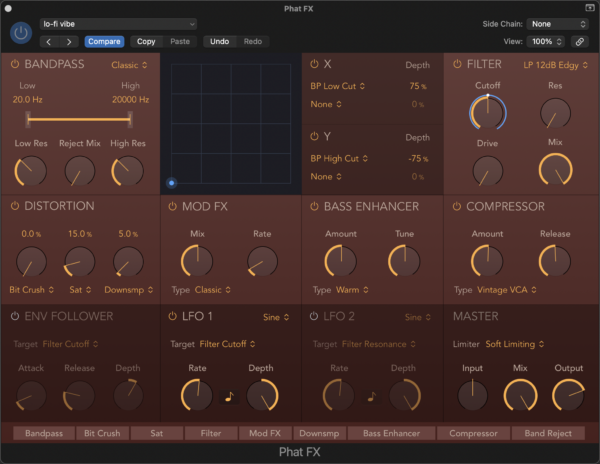
Phat FX is easy to overlook. But this multi-effects beast shapes tone like a hybrid of Decapitator, OTT, and a pedalboard, all in one.
But this multi-effects beast can shape tone like a hybrid of Decapitator, OTT, and a pedalboard—all in one.
Start by loading it on your synth or bass track. Then:
- Turn on Distortion for grit.
- Add Compression and tweak “Punch” for transient control.
- Use the Filter section to sculpt the body.
- Add Mod FX for motion.
- Use the Limiter and Gate to tame the final output.
For a lo-fi vibe:
- Add Distortion (Soft Saturation + Downsampler) + Mod FX (Classic) + LFO 1 Filter Cutoff.
Think of Phat FX as your tone sculptor. If you want dedicated saturation with five analog models to choose from, ChromaGlow covers that ground too. Either way, if you were going to buy RC-20 or Decapitator just for color, save your money.
Delay Designer vs. FabFilter Timeless / EchoBoy
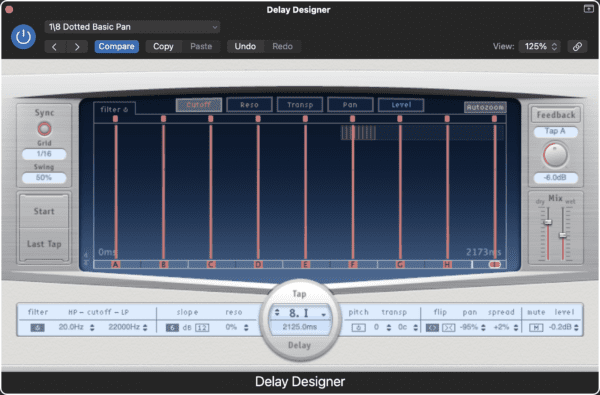
For rhythmic, multi-tap, ping-pong delays, Delay Designer is built for the job.
Drop it on a bus, and:
- Turn on Sync mode.
- Add multiple taps (click the white dots).
- Adjust pan, feedback, and EQ for each tap.
- Use filters to darken the repeats.
- Automate the Wet Mix for cool throws.
You can literally build polyrhythmic echoes that evolve with your song, whether you're after glitchy, experimental, or cinematic vibes. For instant groove, sync taps to 1/8T, 1/4D, and 1/16 grid values.
Pitch Correction vs. Auto-Tune
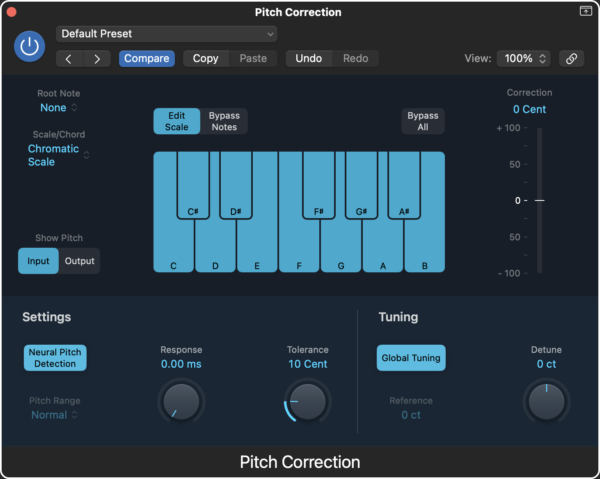
Logic’s Pitch Correction handles tight tuning well, even if it's not as deep as Auto-Tune Pro.
To dial it in:
- Load Pitch Correction on your vocal.
- Set the key and scale.
- Set Response to fast (for robotic style) or slow (for natural tuning).
- Use the Detune knob for subtle pitch shifts.
It won't give you formant shifting, but for $0 it keeps you in key.
Mastering Assistant vs. Ozone Elements
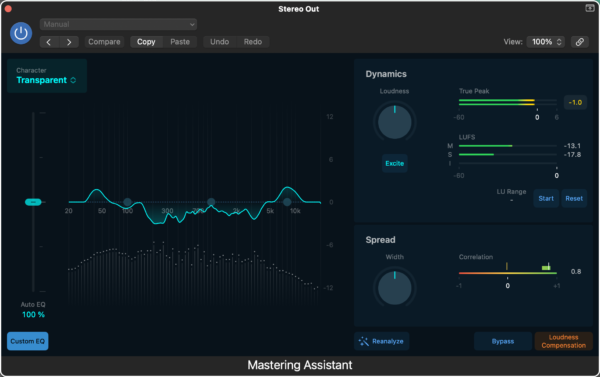
Logic’s Mastering Assistant (introduced in Logic Pro 10.8) is built to compete with iZotope's entry-level tools, and it holds its own.
A quick workflow to try:
- Insert Mastering Assistant on the stereo out.
- Let it analyze and apply settings.
Don't set and forget, though. Open the plugin and tweak EQ, dynamics, and stereo spread to taste. For final polish, add Loudness Meter and target -14 LUFS for streaming.
BONUS: Underrated Utility Plugins
These plugins won't win beauty contests, but they'll save your mix:
- Gain: Automate volume before FX chains.
- Direction Mixer: Narrow low-end or widen highs.
- Spreader: Instant vocal doubling.
- Tremolo: Add subtle movement to static sounds.
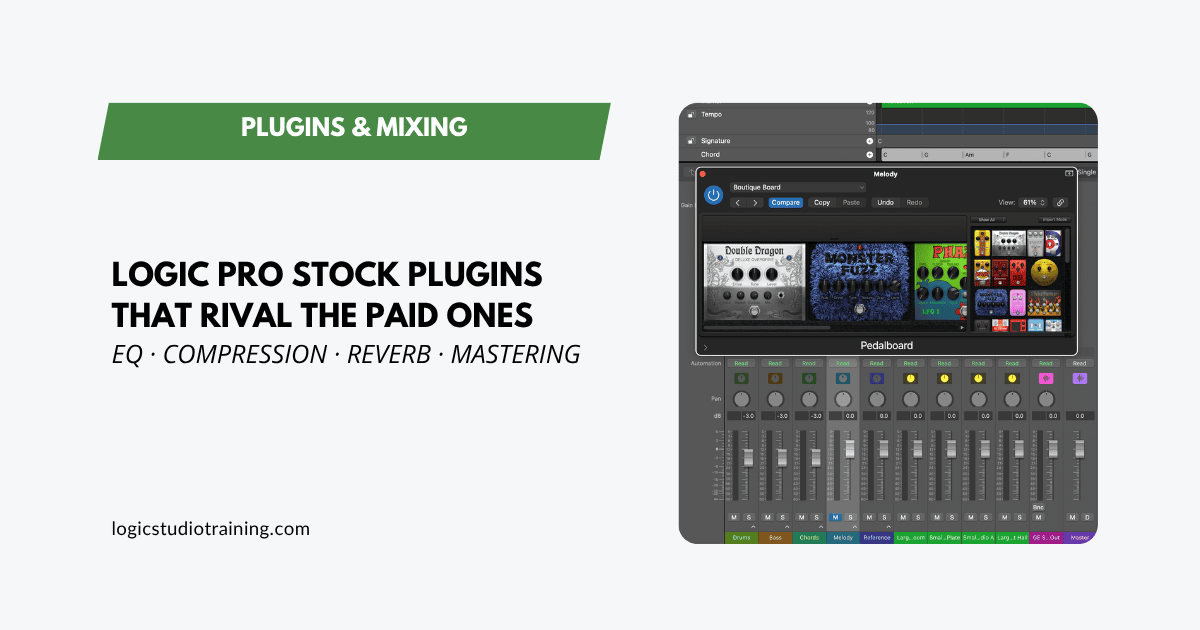
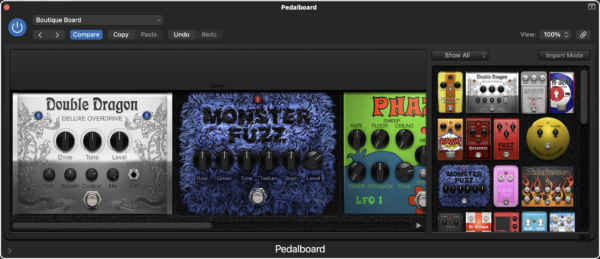
Pedalboard deserves a mention too, a modular dream for guitarists and sound designers. Layer fuzz, mod, delay, and reverb chains that sound like boutique pedal rigs.
Wrapping Up: You Don’t Need More Plugins
What you actually need is more time with the ones you already have.
Logic Pro's stock plugins are pro-grade: stable, CPU-efficient, and tightly integrated with the DAW. If you're serious about getting better at mixing and sound design, master these tools first.
Your wallet and your workflow will both come out ahead.
Free Download
Get the Free Logic Pro Mixing Cheat Sheet
The essential mixing reference for Logic Pro — key settings, signal flow, and mix decisions on one page. Enter your name and email and I'll send it right over.
Your information stays private. No spam, no sharing, ever.
Thanks Graham. Great post. The more I use Logic, the more great discoveries I am making.
I don’t appear to have mastering assistant plug in. Is that because I’m using Logic X rather than XI?
Thanks for the kind words—glad you’re making great discoveries in Logic!
You’re exactly right: the Mastering Assistant is a new feature introduced in Logic Pro 11. If you’re still using Logic Pro X, you won’t see it in your plugin list.
If you’re curious about what it does and how to use it, I break it all down here:
Logic Pro Mastering Assistant Tutorial
Worth the upgrade if you’re doing your own mastering!
For sure I’ve used logic plug-ins before I bought a new computer and they no joke. The reason I use third parties plug-ins because they do things that help workflow or logic can’t do yet. Also I’ve heard that Logic Pro can do mid-side on the channels, is this true? If so how would you use this feature?
Totally agree that Logic’s stock plugins are no joke. And you’re right: some third-party plugins really shine when it comes to specific workflows or creative features Logic hasn’t built in yet. I always say, use what works for you.
And yes, Logic Pro can do mid-side processing, but it’s not always obvious.
Here’s how you can use it:
I’ll cover this in more detail soon.