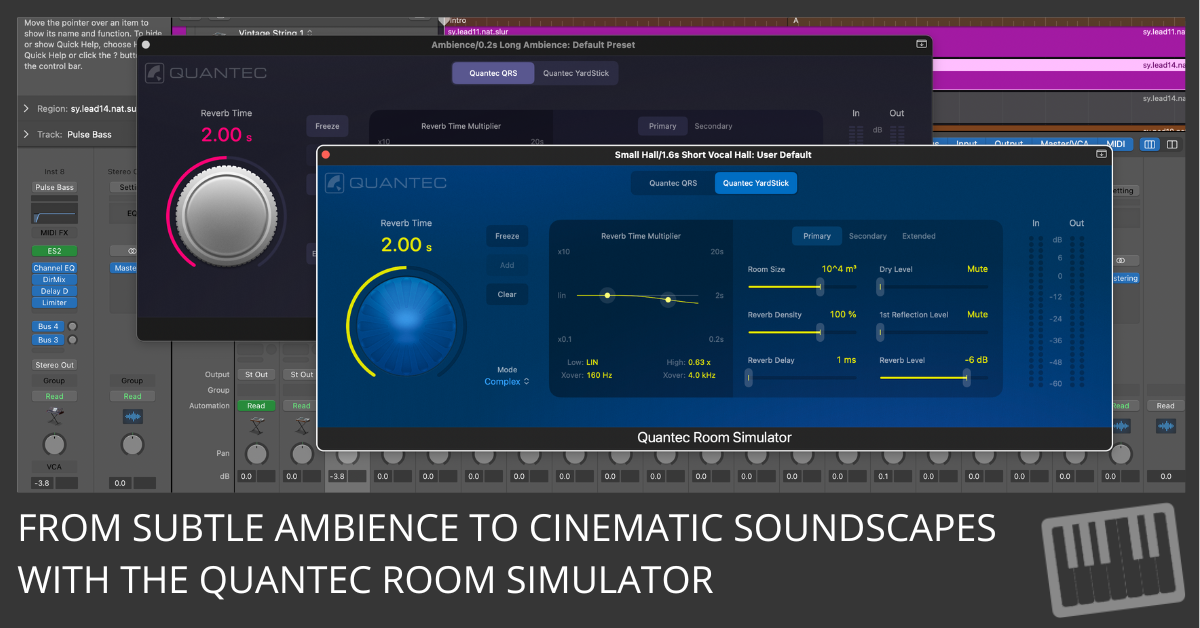
The Quantec Room Simulator (QRS) isn’t just another plug-in—it’s the secret weapon for anyone looking to create stunningly realistic and immersive reverb effects in their tracks.
Whether you’re scoring films, producing music, or adding life to dialogue, the QRS and its modern counterpart, the YardStick, are tools you need to master.
Here’s everything you need to know to get started, enhance your skills, and create sounds so good that people will think you recorded in a million-dollar studio.
1. Why the Quantec Room Simulator is a Game-Changer
Let’s start with the basics. The QRS, launched in the 1980s, changed the game by offering natural and transparent reverb. No harsh metallic sounds. Just smooth, lifelike acoustics that brought tracks to life.
Its standout feature? The Freeze function, which lets you capture and loop reverb tails infinitely. This wasn’t just reverb—it was a creative tool for building textures and soundscapes. Fast forward to today, and the YardStick models build on this legacy with modern enhancements, like precise frequency control and advanced spatial modeling.
You’re not just simulating rooms; you’re creating sonic experiences.
2. Setting It Up in Logic Pro
Adding the Quantec Room Simulator to your track is as simple as making a cup of coffee.
- Open your Logic Pro project.
- Select the track you want to enhance.
- Go to the channel strip and click the Audio Effects slot.
- Choose Reverb > Quantec Room Simulator from the menu.
- Pick your reverb model: QRS for that vintage vibe or YardStick for modern precision.
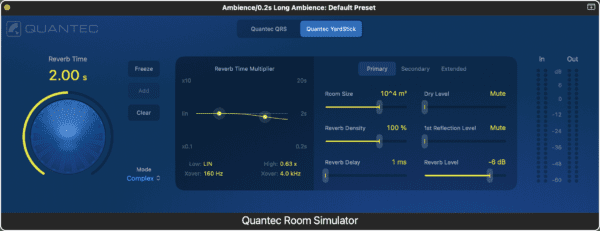
Once it’s loaded, you’ll see an intuitive interface packed with customizable controls. Adjust the Reverb Time and tweak the Room Size to start shaping your sound.
Why You Should Use Reverbs on Auxiliary Tracks
Reverbs often work best as send effects on auxiliary tracks. This allows you to blend the original sound with the reverb independently, creating more control and saving CPU power when using the same reverb across multiple tracks.
Here’s the quick process:
- In the channel strip, select a send slot and choose a bus to create an auxiliary track.
- Add the Quantec Room Simulator to the auxiliary track as an insert effect.
- Adjust the send level on each track to balance the reverb’s presence in your mix.
Using auxiliary tracks ensures your reverb adds cohesion without overpowering your mix. For a deeper dive into send effects and creative uses for auxiliary tracks, check out Chapter 17 of Logic Pro For Dummies.
This quick adjustment could transform how you approach reverb in Logic Pro!
3. The Art of Shaping Reverb
Here’s the deal: reverb can make or break a mix. Too much, and it’s a muddy mess. Too little, and your track sounds lifeless.
To get the perfect reverb:
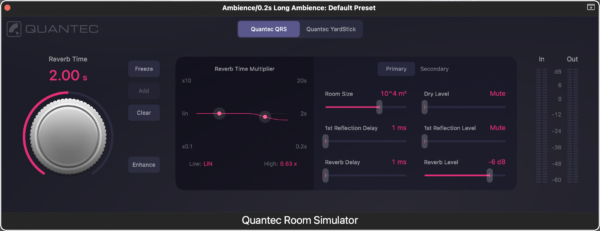
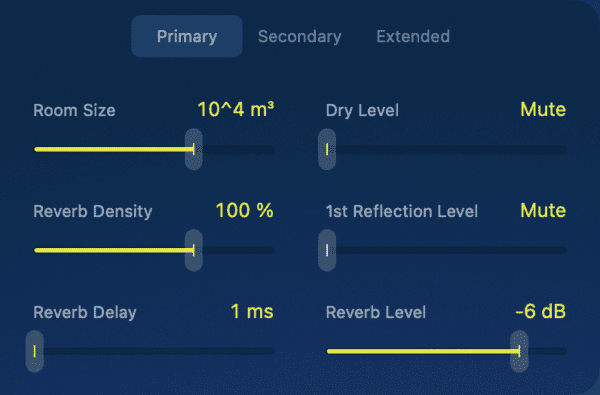
- Start with the Room Size: Adjust this slider to match the environment you’re simulating. Tiny room? Slide it down. Massive cathedral? Crank it up.
- Fine-tune the Reverb Time: This controls how long the reverb lasts. Short for tight spaces, longer for lush soundscapes.
- Use the Multiplier Curve: This feature lets you shape the frequency response. Drag the control points to make your reverb brighter (boost highs) or darker (cut highs).
For example, if you’re mixing a vocal, you might want a medium Room Size and a short Reverb Time to keep it clear and intimate.
4. Freeze: The Creative Goldmine
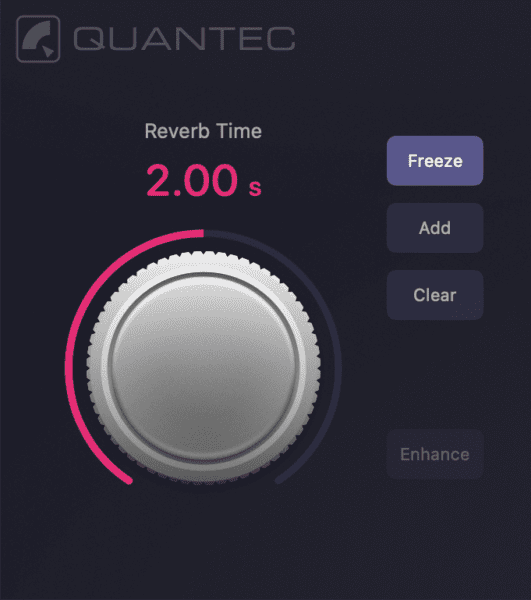
The Freeze button isn’t just a tool; it’s an inspiration factory.
Here’s how to use it:
- Activate Freeze to capture the current reverb tail.
- Use the Add button to layer new sounds, creating complex, evolving textures.
- Need a clean slate? Hit Clear to reset the Freeze effect.
Picture this: You’re working on a cinematic intro. Freeze a lush reverb tail, layer some eerie strings over it, and voila—you’ve just created an atmosphere straight out of a blockbuster.
5. Enhance: Clarity and Depth
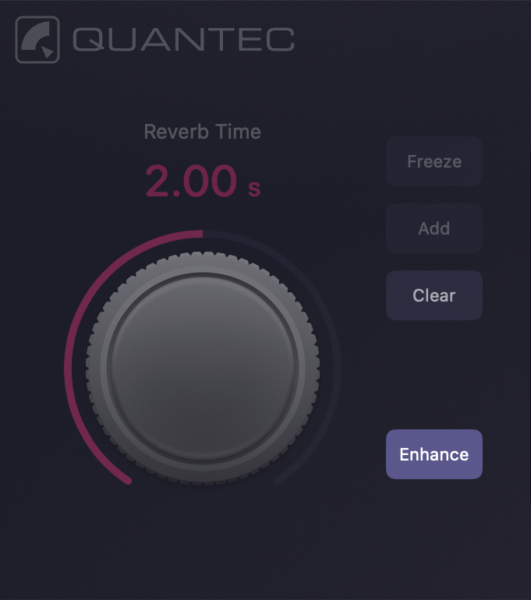
The Enhance feature replaces traditional reverb tails with dense clusters of reflections. This isn’t just about adding space; it’s about giving your track clarity and depth.
Here’s what to do:
- Turn on Enhance.
- Adjust the Room Size to control the density of reflections. Smaller rooms = tighter clusters. Larger rooms = richer, more spacious reflections.
Pro tip: Use Enhance on mono signals to transform them into wide stereo or binaural audio. Perfect for creating immersive headphone mixes.
6. YardStick: Reverb for the Modern Producer
If QRS is the vintage legend, the YardStick is the modern hero. With updated algorithms and advanced controls, it’s designed for today’s production needs.
Here’s why you’ll love it:
- Reverb Density lets you control the texture of the reverb tail. Go above 100% for a richer sound, but watch out for metallic artifacts.
- Frequency Multipliers give you precision over low and high frequencies. Shape your reverb to match the mood—bright for pop, dark for drama.
- Mode Selector offers three reverb styles: Simple, Medium, and Complex.
For instance, if you’re scoring a sci-fi film, use the Complex mode for detailed, evolving reflections that transport listeners to another world.
7. Balancing the Mix
A great reverb shouldn’t drown your mix; it should complement it. Here’s how to strike the right balance:
- Use the Dry Level slider to control the direct signal’s output.
- Adjust the First Reflection Level to add intimacy or spaciousness.
- Fine-tune the Reverb Level for the perfect blend.
Imagine you’re mixing a ballad. Start with the vocals dry, then gradually add reflections to create warmth and depth without overpowering the lyrics.
8. Stereo Imaging and Subtle Details
Stereo width can make a mix feel massive or intimate. The Quantec Room Simulator has you covered:
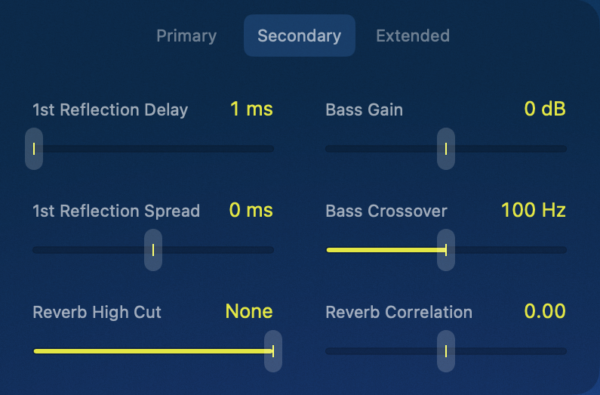
- Use the Reverb Correlation slider to widen or narrow the stereo spread.
- Adjust the First Reflection Spread to control the stereo width of early reflections.
For subtle details, turn on the Subsonic Filter to remove inaudible low frequencies that can muddy your mix.
For example, when mixing an acoustic guitar, a narrow spread keeps it intimate, while a wide spread creates a dreamy, expansive vibe.
9. Taking Your Workflow to the Next Level
Want to work smarter, not harder? Here are three ways to streamline your process:
- Save Presets: Once you’ve dialed in the perfect settings, save them as presets for future projects.
- Monitor Signal Levels: Use the In and Out meters to keep your levels clean and distortion-free.
- Experiment and Iterate: Don’t be afraid to try extreme settings. You might stumble upon your next signature sound.
10. Bring Your Mixes to Life
The Quantec Room Simulator isn’t just a plug-in—it’s a creative playground. From lush cinematic reverbs to tight, focused spaces, it gives you the tools to craft sounds that stand out.
Whether you’re a seasoned pro or just starting out, mastering these features will elevate your mixes, wow your listeners, and give your tracks that polished professional edge.
Now go make some magic. Your perfect reverb is just a few clicks away.
Enter your first name and email address and click the "Get Access Now!" button to get your free mixing guide.
Your Information is 100% Secure And Will Never Be Shared With Anyone!
