
Arranging music is all about crafting the right structure and energy, and Logic Pro is packed with tools to help you do it.
Whether you're looking to add more emotion to a ballad or inject some energy into an electronic track, these five steps will sharpen how you build your arrangements.
Let's walk through how to make your music sound tighter and more dynamic.
Step 1: Start with a Solid Structure
Before you dive into the details of arranging, lay down a solid structure for your track. Think of it like building the foundation for a house: it gives everything else a place to sit.
Start by deciding on the sections of your song: Intro, Verse, Chorus, Bridge, and Outro. If you're not sure, a good template is the common Verse-Chorus-Verse-Chorus-Bridge-Chorus structure. (See also: 5 Reasons Why Structure Is the Key to Better Songwriting—Not a Limitation)
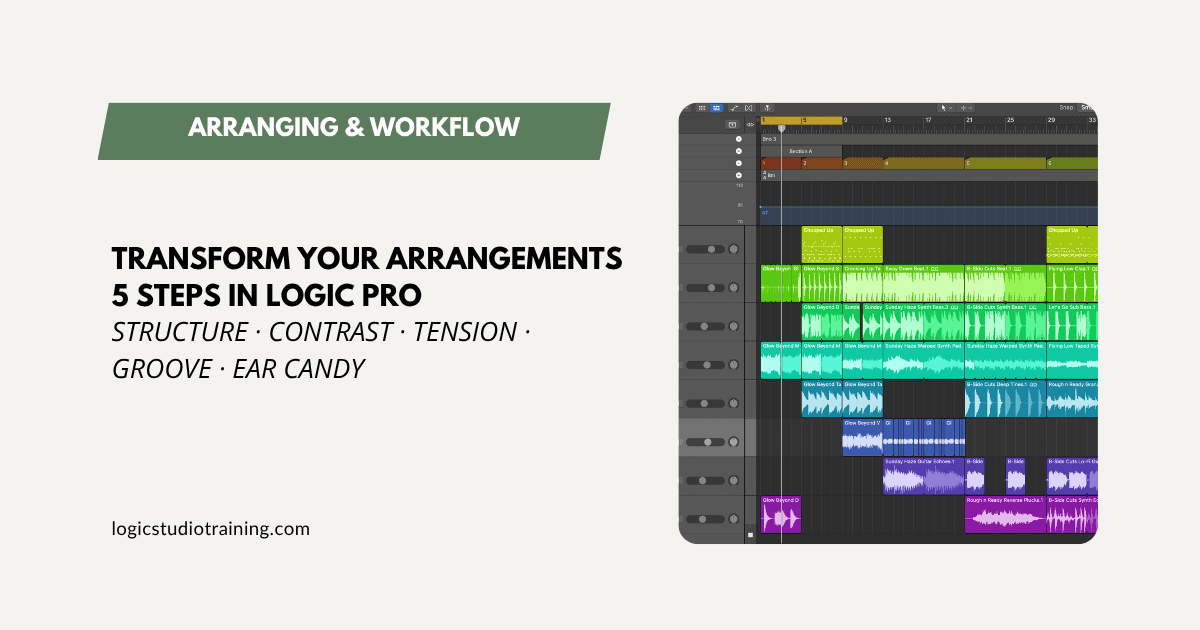
For example, let's say you've got a simple verse and chorus laid out. Go into the Arrangement Track in Logic Pro. Use Arrangement Markers to label each section (Intro, Verse, and so on). These markers help you visualize the flow of your song. Move the sections around like Lego blocks if needed, testing how a new order feels. You might find that starting with a stripped-down chorus creates an intriguing opener.
Your move: Map out your arrangement with these markers, then listen to the overall flow and tweak it until it makes sense to your ears.
Mastering Arrangement in Logic Pro: Optimize Your Tracks for Cohesive Sound. Learn how to create cohesive music arrangements with our expert tips on track compatibility, sound balance, and mixing. Perfect for budding music producers and mixers.
Step 2: Create Contrast with Instrumentation
The easiest way to keep your listeners hooked is through contrast. One of the best tools for contrast is changing up your instrumentation.
For example, in your verse, maybe you only have drums, bass, and a guitar. For the chorus, double the number of instruments by adding a pad synth, strings, or a second guitar playing harmonics. The idea is to make your chorus sound bigger and fuller than the verse.
In Logic Pro, use the Track Stacks feature to create layers. If you're working with drums, build a track stack that combines a tight, dry snare with a more reverberant snare sample. Use that stacked snare in the chorus to give it a powerful, stadium-sized feel. For the verse, mute the extra snare to keep things intimate.
In practice: Layer your sounds so the chorus stands out, and use Track Stacks to keep everything organized and easy to manage.
Step 3: Build and Release Tension with Automation
Music is all about tension and release. Without it, songs feel flat and boring. One of the most powerful tools for creating tension in Logic Pro is Automation, which lets you control parameters like volume, panning, and effects over time, adding dynamic shifts to your arrangement.
Take a reverb send on a vocal. In the verses, keep the reverb tight and close, but as you approach the chorus, gradually increase it to give the vocal a more spacious, ethereal quality. When the chorus hits, drop the reverb back down to ground the vocal again. This works best when your reverb is set up on a dedicated send rather than inserted on the track, because the send level becomes a clean parameter you can automate on its own.
Another trick is to automate filter sweeps on synths. Slowly open up the filter as you build into a chorus or bridge, then slam it shut again when the drop happens. This keeps listeners on edge and gives your arrangement a satisfying payoff.
Setup: Highlight the track you want to automate, press A to open the Automation view, and select the parameter you want to control. Draw your changes onto the automation line to shape how things evolve over time.
Step 4: Use Groove Templates for Tight Rhythmic Feel
A tight groove is essential for making your arrangement feel professional. If your drums, bass, and other rhythmic instruments aren't perfectly locked in, the whole track can feel sloppy. This is where Groove Templates in Logic Pro come in handy.
Let's say you've recorded a drum loop that has a nice human feel, but your bass is lagging slightly behind, and it's killing the groove. Instead of re-recording the bass, create a groove template from your drum loop. Select the drum region, go to the Region Inspector, and choose Make Groove Template from the Quantize menu. Now apply that groove template to your bass track, and it locks in perfectly with the drums.
Watch out: Use Groove Templates to tighten any instruments that drift off the groove. Don't overdo it, since keeping some human feel matters, but lean on this tool when you want that tight, professional sound.
Using Groove Tracks in Logic Pro. In this video, you'll discover how to create audio and MIDI tracks that feel good together using Groove Tracks in Logic Pro.
Step 5: Add Ear Candy with Subtle Effects
Finally, if you want your arrangements to truly stand out, add subtle ear candy throughout your track. Ear candy refers to small, interesting details that pop up throughout a song, like background vocals, percussive accents, or sound effects that make the track feel polished and engaging.
Use Logic Pro's Flex Time feature to stretch or shorten audio regions, creating unique, warped effects on vocals or instruments. Or try adding a subtle delay to a guitar in the pre-chorus, letting it echo into the chorus for an added touch of ambience.
Another great tool is Alchemy in Logic Pro, which can generate ambient textures you can weave into your track. Try adding a soft, reversed cymbal swell before a transition, or a random sound effect panned to the far right to create a momentary surprise for the listener.
Where to begin: As you go through your track, listen for spots that could use a bit of extra flavor. Drop in some ambient effects, use automation to control when they arrive, and keep them from overwhelming the main elements of your track. If you find yourself reaching for the same effect tweaks often, map them to Smart Controls so you can shape and automate them without digging through plugin windows mid-flow.
5 Strategies to Add 'Ear Candy' to Your Tracks & Elevate Your Music Production with Subtle Sonic Magic. Explore advanced techniques to add "ear candy" to your tracks in Logic Pro. Learn about transitional effects, vocal production, percussion layering, and more. Elevate your music production skills today!
Final Thoughts
Transforming your arrangements with Logic Pro takes a few smart strategies rather than a complete overhaul of your workflow. Focus on building contrast, creating tension and release, tightening your groove, and adding ear candy to polish it all off. Follow these five steps and your music will have the depth and dynamic flow it needs to hold your audience from start to finish.
So open up Logic Pro and put these steps to work on your next arrangement.
(NOTE: Need Arranging and Editing training? See Logic Studio Training's Arranging and Editing with Logic Pro training program by clicking here.)
