
Ready to take your Logic Pro tracks from "just okay" to "oh wow, who mixed this masterpiece?"
Buckle up, because we're diving headfirst into the sonic wonderland of Logic Pro's Mastering Assistant.
And let me tell you, it's going to be a wild ride – think rollercoaster, but with more bass drops and fewer height requirements.
Introduction: The Mastering Party Starts Now
So, you've mixed your heart out, and your track is sitting pretty, but it's missing that sprinkle of fairy dust – that sonic sparkle.
Enter Mastering Assistant, Logic Pro's secret sauce.
It's like having a tiny audio wizard in your computer, ready to wave its magic wand over your mix.
What is Mastering? A Quick Rundown
Mastering is the cherry on top of your audio sundae.
It's the final polish, the last hurrah before your track struts out into the world.
And no, it's not just turning up the volume to eleven.
It's about balance, clarity, and making sure your track doesn't sound like it was recorded in a potato.
Introducing Logic Pro's Mastering Assistant: Your New Best Friend
Logic Pro's Mastering Assistant is like that friend who always knows their angles for the perfect selfie.
It listens to your track, gives it a thoughtful chin rub, and then applies EQ, compression, and a touch of wisdom so it's ready for its close-up.
Preparing Your Mix: Don't Be That Person
You know the one. They show up to a potluck with nothing but an appetite.
Don't be that person.
Prep your mix before you master.
Tidy up those tracks, balance those levels, and, for goodness' sake, make sure you're not peaking more than a teenager's interest in TikTok.
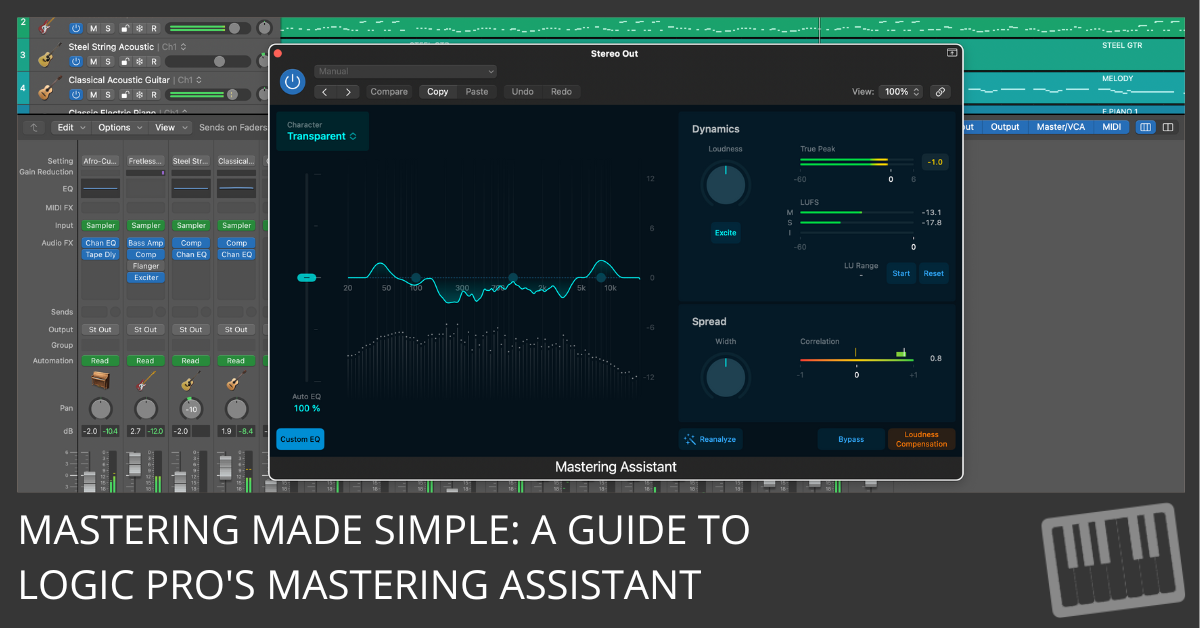
Step-by-Step Guide: The Mastering Assistant Walkthrough
- Step 1: Inserting the Wizard... I Mean, Assistant
On Mac, you can add it by clicking 'Mastering' in the last Audio Effect slot on the Stereo Out channel or through the Mix menu. On iPad, it's added via the Mixer button and then the Mastering option at the bottom of the Audio Effect slot. - Step 2: The Magic Begins – Automatic Analysis
The Mastering Assistant goes full Sherlock Holmes on your track, deducing what needs a tweak. - Step 3: Choosing Your Character – Like an RPG, But Cooler
Pick a preset that vibes with your track. 'Transparent' for honesty, 'Clean' for that fresh-out-of-the-shower feel, 'Valve' for warmth like a hug from your grandma, and 'Punch' for... well, it's in the name. - Step 4: EQ – Sculpting Sound Like Michelangelo
Slide those EQ controls like you're sliding into DMs – smoothly and with intention. - Step 5: Loudness – Because Whispering is for Libraries
Crank that Loudness knob to get your track heard, but don't blow our eardrums, please. - Step 6: Stereo Width – It's Like Social Distancing for Your Instruments
Turn that Width knob and give your sounds some personal space. - Step 7: Reanalyze – Because Second Opinions Matter
Made changes? Hit 'Reanalyze'. It's like asking, "Does this mix make me look fat?" - Step 8: Bouncing – Not Like a Basketball
Disable Loudness Compensation, check your hair in the mirror, and bounce that track out into the world.
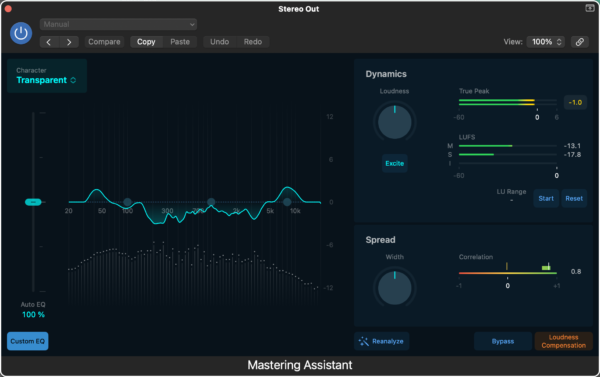
Presets and Sliders and Meters, Oh My!
Choosing Your Character: Preset Power
First up, we've got character presets. Think of them as your track's new wardrobe. You've got:
- Clean: Crisp like a fresh pair of sneakers.
- Valve: Warm like your favorite vintage flannel.
- Punch: Hits harder than a caffeine rush on a Monday morning.
- Transparent: So subtle, it's like your track's wearing an invisibility cloak.
Pick one that vibes with your tune, and watch it transform from Clark Kent to Superman.

Auto EQ: Your Track's Personal Trainer
Next, the Auto EQ slider. It's like a personal trainer for your song's frequencies, whipping them into shape until they're lean, mean, and ready to conquer the charts. Slide to the right for more oomph, or keep it left for a gentle nudge.

The Reanalyze Button: Because Change is the Only Constant
Changed your mind? Added a new layer? Hit the Reanalyze button. It's like asking your robot buddy, "Hey, give it another look, will ya?" And just like that, it's on the case, making sure your track is still sitting pretty.

Bypass and Loudness Compensation: The True Mirror
Want to hear your track without all the bells and whistles? Hit Bypass. It's like stepping out of a costume and checking yourself out in the mirror. And Loudness Compensation? That's making sure you're not just louder, but actually better.

Cranking Up the Dynamics: Because Flat is Only Good for Soda
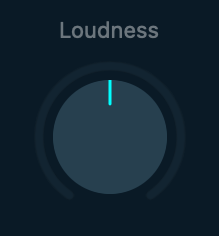
Loudness Knob: Turn It Up to Eleven
The Loudness knob is your volume dial for the digital age. But this isn't just about shaking windows; it's about hitting that sweet spot where your track feels just right.
Excite Button: Add Some Spice
Feeling spicy? The Excite button adds a dash of sonic hot sauce to your mix. It's like sprinkling chili flakes on your pizza – a little goes a long way.

Stereo Width and Phase: The Dance of the Headphones
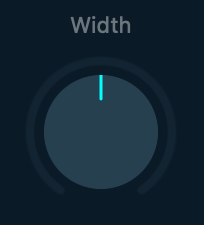
Width Knob: Your Track's Yoga Stretch
The Width knob stretches your sound like it's prepping for a yoga class. Turn it, and your track goes from sitting on the couch to doing a full splits. Just watch for overstretching – nobody likes a pulled muscle.
Correlation Meter: The Friendship Bracelet of Frequencies
The Correlation meter shows how well your left and right channels get along. You want them tight, like besties wearing matching friendship bracelets. If they're not, it's time for a heart-to-heart.

EQ and Spectrum: Painting with Sound
Spectrum Analyzer: Your Audio Kaleidoscope
The Spectrum Analyzer is like a kaleidoscope for your ears. It shows you all the colors of your sound, so you can make sure each one shines.
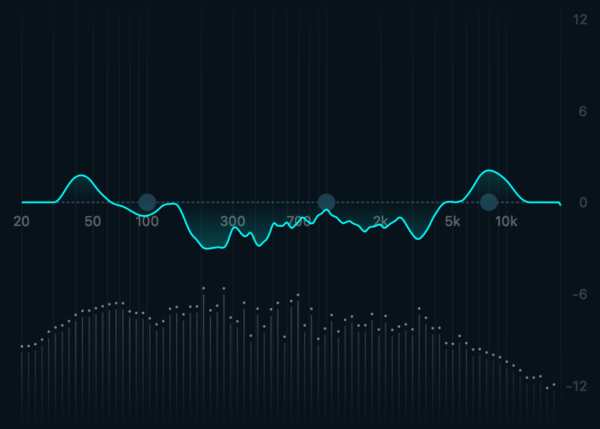
Custom EQ: The Fine Art of Sound Sculpting
And if you're feeling artsy, the Custom EQ is your chisel. Carve out the perfect sonic statue from the marble that is your mix.

Action Steps: Your Mastering Montage
Now, let's get down to business. Here's your training montage, complete with high-fives and freeze-frames:
- Pick your preset – go on, try them on like hats.
- Tweak that Auto EQ – make it purr.
- Reanalyze after changes – keep it fresh.
- Use Bypass and Loudness to check yourself – stay true.
- Crank the Loudness – but keep it classy.
- Hit Excite – add a little zing.
- Watch those meters – no red zones, please.
- Stretch with Width – find your space.
- Keep your channels in check – phase is your friend.
- Sculpt with EQ – make Michelangelo jealous.
Wrapping It Up: You're Now a Mastering Maestro
Look at you, all mastering like a pro!
With Logic Pro's Mastering Assistant, you're ready to take on the world, one track at a time.
So go ahead, give it a whirl, and remember: in the land of the sonic, the one with the Mastering Assistant is king.
Free Download
Get the Free Logic Pro Quick Start Guide
The key workflows, settings, and shortcuts to get up and running in Logic Pro fast. Enter your name and email and I'll send it right over.
Your information stays private. No spam, no sharing, ever.