
You just played the perfect riff. Or sang the one vocal line that actually gave you chills. And then you realize—Logic wasn’t recording.
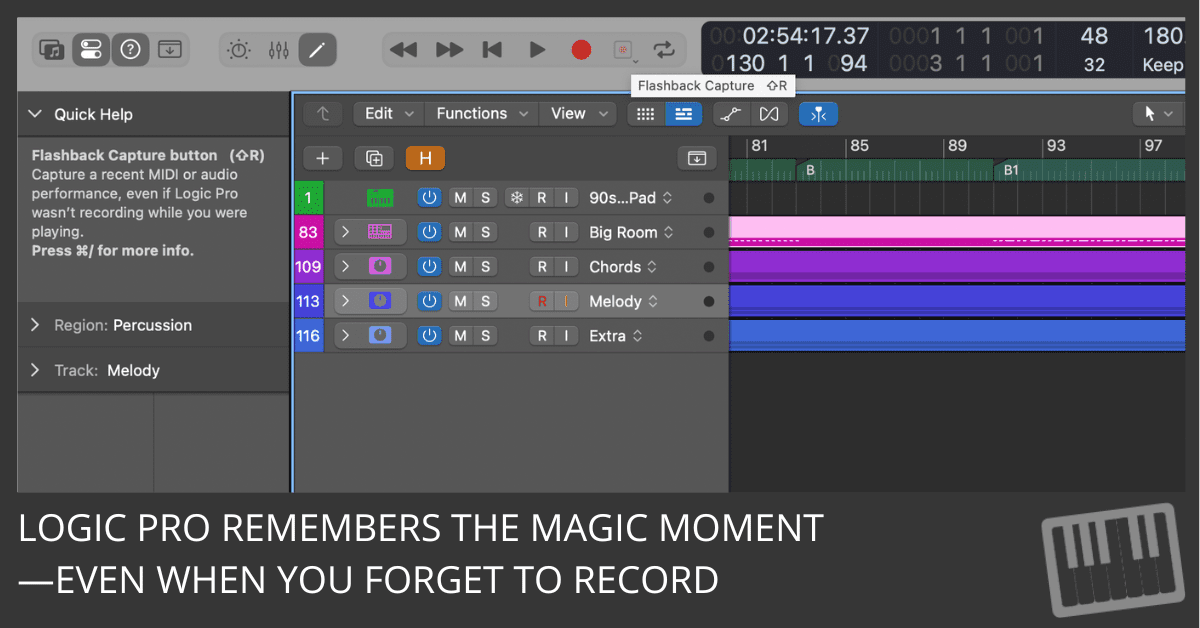
Don’t panic. Don’t punch your MIDI keyboard in shame. Logic Pro 11.2 has your back with Flashback Capture, a feature that quietly listens in while you perform and lets you grab your last take, even if you never hit Record.
It’s like a musical time machine. And it works for both MIDI and audio.
Let’s walk through exactly how to set it up and use it, so you never lose a great idea again.
🛠 First, Turn It On
To use Flashback Capture, Logic needs to unlock its full toolkit. Here's what to do:
- Open Logic Pro.
- From the menu bar, choose Logic Pro > Settings > Advanced.
- Check the box for Enable Complete Features.
That’s it. You’re armed and dangerous.
🎛 Add the Flashback Capture Button
You can trigger Flashback with a shortcut (Shift–R), but adding a visible button is smart too.
Here’s how:
- Right-click anywhere on the Control Bar.
- Choose Customize Control Bar and Display.
- Find Flashback Capture in the list and turn it on.
- Close the customization panel.
You’ll now see the button glowing to let you know a take is ready to be captured.
🎹 MIDI Capture: Grab It Even If the Playhead Wasn’t Moving
Logic listens for MIDI even when you're not recording. So if you just noodled something on your controller, you can still grab it.
While Logic Is Playing:
- Click to focus on a Software Instrument track.
- Hit Play and jam on your MIDI controller.
- When you’re done, press Shift–R (or click the Flashback button).
- Boom—a new MIDI region appears at the playhead.
While Logic Is Stopped:
- Perform some MIDI notes with Logic stopped.
- Hit Shift–R within 20 seconds to catch everything you played.
- If some notes are missing (Logic hides notes before a long pause), just drag the left edge of the region to reveal them.
Pro tip: If you want to drop captured notes into your project without any tempo data (like, locked to the grid), Control-click the Flashback button and turn off Flashback Capture MIDI in Stop Mode.
🎤 Audio Capture: For When You Sing First, Think Later
Flashback also works with audio—vocals, guitar, saxophone solos—whatever you're tracking.
Here’s how to use it:
- Click an audio track to focus it.
- Press Play and start performing. Logic needs at least 4 seconds of playback to capture.
- As long as you’re sending a live audio signal, Logic is listening.
- When you’re done, press Shift–R (or click the Flashback button).
- Logic creates a new audio region where the sound was detected.
Heads-up: Flashback does not capture audio when Logic is stopped. No playback = no audio capture. Make sure you hit Play before your big moment.
🔁 Capture Multiple Takes in Cycle Mode
Want to experiment with different ideas and organize them neatly? Use Cycle mode with Take Folders.
For MIDI:
- Go to Settings > Recording.
- Under Overlapping Track Recordings, set MIDI Cycle On to Create Take Folder.
- Enable Cycle mode by clicking the Cycle button or pressing C.
- Hit Play and jam. Each loop will be a separate take.
- Press Shift–R to save them as a take folder.
For Audio:
- Go to Settings > Recording.
- Set Audio Cycle On to Create Take Folder.
- Turn on Cycle mode and perform your part.
- Press Shift–R to capture the takes and organize them.
Now you've got a tidy stack of variations you can comp later—without ever hitting Record once.
🚀 Final Tip: Build the Habit
Flashback Capture is amazing, but you still need to remember to press Shift–R when the magic moment strikes. If you're prone to forget, here's a suggestion:
After every session, ask yourself:
“Did I just play something worth keeping?”
If the answer is even maybe, press Shift–R.
Because the worst feeling in music production isn’t a bad take.
It’s the perfect one… lost forever.
Enter your first name and email address and click the “Get Access Now!” button to get your free guide.
Your Information is 100% Secure And Will Never Be Shared With Anyone!