
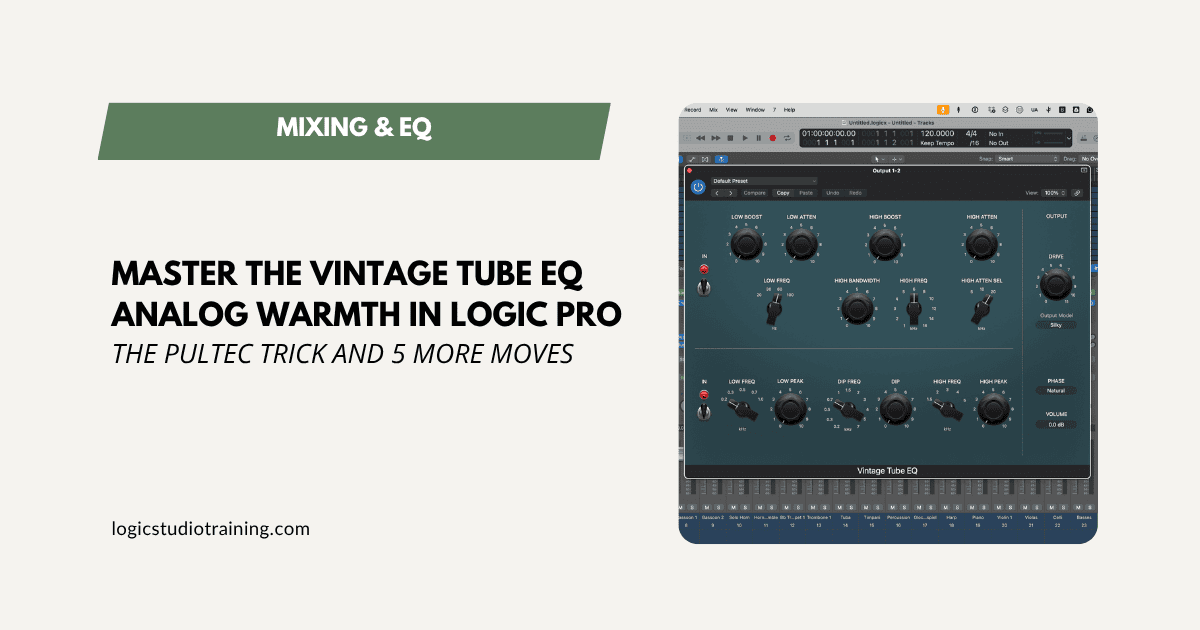
You want that rich, analog sound, but you don't have a rack of vintage gear sitting in your studio. The Logic Pro Vintage Tube EQ gets you most of the way there for free.
It's modeled on classic 1950s tube hardware, and it brings a specific flavor to the digital world: fat boosts, smooth cuts, and a bit of harmonic color that makes a track feel alive. Getting the real "Pultec" magic out of it takes a couple of tricks that aren't obvious from the interface.
Let's walk through them.
Understanding the Vintage Tube EQ Layout
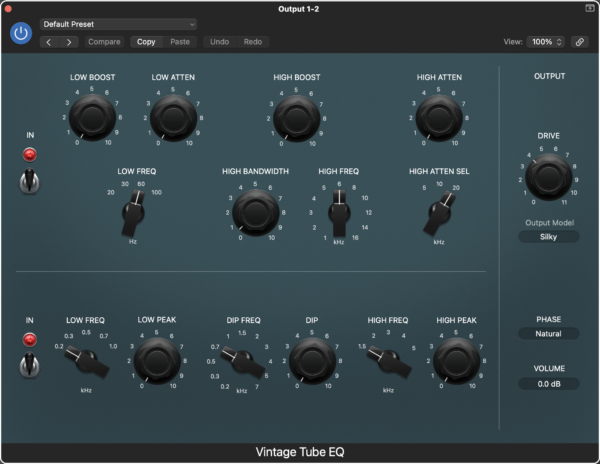
Logic's Vintage Tube EQ borrows from the analog units that shaped the sound of records for decades. It splits into three main sections.
- Low-Frequency Control: This section allows you to boost or cut frequencies from 20 Hz to 100 Hz, ideal for creating rich, thick, low-end.
- High-Frequency Boost: This control offers adjustable boosts between 3 and 16 kHz, perfect for adding brightness and clarity to vocals or guitars.
- High-Frequency Attenuation: This section lets you roll off highs at 5, 10, or 20 kHz to smooth out sharpness, which is especially useful for taming harshness in cymbals, strings, or sibilant vocals.
There's also a Bandwidth Control that sets how wide or narrow the high-frequency boost is, so you can go broad and gentle or tight and surgical. Spend a few minutes with this layout and the plugin stops feeling like an EQ and starts feeling like a tone-shaping instrument.
Making the Boost and Attenuate Technique Work for You
The best-kept secret of vintage EQs is boosting and cutting the same frequency at once. It's called the "Pultec trick," and the Vintage Tube EQ makes it easy. Done right, it adds weight to a track without letting the low end swallow the mix. (It's one of several stock-EQ moves worth knowing, alongside the ones in our Logic Pro EQ tricks guide.)
- Set the Low Frequency: Choose a low frequency, such as 60 Hz, if you’re working with a kick drum or bass.
- Apply a Boost: Start with a strong boost—around halfway to 13 dB—to achieve a full, powerful low end.
- Add a Low-Frequency Cut: Immediately after boosting, dial in a cut at the same frequency range. This creates a unique “dip” in the low-mid frequencies, balancing fullness with control.
The result is a low end that hits hard but stays clean. It works beautifully on kick drums, bass, and deep male vocals.
Getting Authentic Analog Warmth with the Drive Knob
The Drive knob is where the analog character actually lives. It adds a light layer of harmonic distortion that gives a track fullness and grit.
- Set EQ Bands to Neutral: Start by setting all EQ bands with no boost or cut, allowing the Drive effect to act independently of other EQ changes.
- Increase the Drive Knob Gradually: Begin with a low setting, around 2-3, and slowly raise it. This lets you control the amount of saturation added.
- Apply to Key Tracks or Master Bus: Use Drive on individual tracks like vocals or guitars for warmth, or apply it to the entire mix on the master bus for a cohesive, analog-inspired touch.
The effect is easy to miss on any single track. Stacked across a mix, it's the difference between a stack of clean stems and a record that sounds glued together. If you want dedicated saturation with five analog models to choose from, ChromaGlow covers that ground in more depth.
Creating Guitar Presence Without the Ice Pick
Guitars often need to cut through a dense mix, and the challenge is doing it without turning them brittle. The Vintage Tube EQ handles both sides of that problem.
- Set a High-Frequency Boost: Start by choosing a high-frequency boost around 4 kHz. This range adds presence and clarity without brittleness.
- Adjust the Bandwidth: Use the Bandwidth knob to shape the boost. A wider setting creates a smoother presence, while a narrower one adds more focused clarity.
- Tame Harshness with High Attenuation: If the guitar starts to sound too sharp, set the High Atten Sel knob to 10 kHz and reduce highs slightly using the High Atten knob. This smooths out any harshness, preserving punch without the “ice pick” effect.
You end up with a guitar that sits proudly in the mix and never claws at the listener's ears.
Enhancing Vocals with the Andrew Scheps Trick
Parallel processing keeps vocals steady and present even when the mix gets busy underneath them. This one uses two instances of the Vintage Tube EQ around a compressor.
- Create a Parallel Track: Set up a second track specifically for parallel compression.
- Add the First Vintage Tube EQ: On this track, use the Vintage Tube EQ to roll off lows around 100 Hz to cut out rumble. Then, boost at 8 kHz to enhance vocal clarity and brightness.
- Apply a Compressor: Follow with an LA2A-style compressor, applying heavy compression to add focus and consistency.
- Add a Second Vintage Tube EQ: Use another instance of the EQ to bring back some low-end warmth and soften any excessive highs.
- Blend with the Main Vocal Track: Mix this parallel track back in with the main vocal for a sound that’s both clear and steady.
(For more on driving Logic's compressors this way, see our guide to vocal compression.)
The main vocal keeps its natural dynamics while the parallel track holds a steady floor of presence under it. No matter how loud the rest of the mix gets, the vocal stays locked in front.
Giving the Master Bus a Polished, Harmonic Finish
To warm up an entire mix at once, put the Vintage Tube EQ across the master bus and use it more for its color than its EQ.
- Insert the Vintage Tube EQ: Place the EQ on your master bus for a final polish on the overall mix.
- Set Bands to Neutral: Keep all EQ bands at zero without any boosts or cuts. This allows the EQ’s natural harmonic color to subtly enhance your mix.
- Raise the Drive Knob Slightly: Increase the Drive knob just a bit to introduce gentle saturation, adding a touch of analog warmth.
- Add Optional Boosts for Extra Magic: For a bit more presence, try a small boost at 8 kHz for airy highs or a bump at 60 Hz for added low-end weight.
None of these moves are dramatic on their own. Together they make a mix feel finished instead of merely mixed.
The Guitar Trick for Added Clarity
For clear, balanced guitar tones that don’t overpower the mix, try this approach with the Vintage Tube EQ:
- Set a Subtle High-Frequency Boost: Adjust the High Freq knob to around 4 kHz, boosting gently by 4-6 dB to add presence without harshness.
- Fine-tune with Bandwidth: Use the Bandwidth control to shape the boost, aiming for a curve that makes the guitar stand out without becoming piercing.
- Tame Excessive Highs: If the guitar sounds too sharp, set the High Atten Sel to 10 kHz and add a touch of High Atten. This smooths out the top end, keeping the guitar audible but never overbearing.
This technique brings clarity to guitars, helping them pop in the mix without clashing with other elements.
Shaping Bass with Depth Instead of Mud
Low end is a balancing act, and the Vintage Tube EQ is built for it. The goal is depth you can feel without the muddiness that buries everything around the bass.
- Set Low Frequency for Depth: Start by setting the Low Freq knob around 30 Hz and apply a boost of 5-8 dB. This creates a deep, warm foundation.
- Use Low Atten to Shape Low Mids: Dial in a slight Low Atten to cut the low mids, removing any muddiness and keeping the bass clean and defined.
This technique adds body without making the bass overwhelming—ideal for styles like rock, hip-hop, or jazz, where a thick yet clear bassline is essential.
Treating the EQ Like a Paintbrush, Not a Scalpel
For broad tonal shaping, think of the Vintage Tube EQ as a wide brush rather than a fine-tip pen. Its strength is musicality, the way it flatters a source instead of surgically correcting it.
- Adjust High Bandwidth for Sound Shaping: Use a wider bandwidth for smooth, polished tones or a narrower boost to highlight specific details without harshness.
These settings enhance the mix’s professional feel, providing warmth and dimension without sacrificing that classic analog vibe.
Blending for Subtle Saturation and Final Touches
Save one last move for the end: a whisper of saturation across everything. Set the Drive knob around 2 or 3 on your tracks, then trust your ears from there. On any single element it's almost inaudible. Spread across a mix, it acts like glue, tying the whole thing together with a warmth that reads as natural rather than processed.
Wrapping Up
The Logic Pro Vintage Tube EQ earns its place on almost any session. Use the Pultec trick to tighten your low end, lean on the Drive knob for saturation, and shape presence into your guitars and vocals. Load it up, run a few tracks through these moves, and listen to how much depth and character it pulls out of a mix that started off flat.
Free Download
Get the Free Logic Pro Mixing Cheat Sheet
The essential mixing reference for Logic Pro — key settings, signal flow, and mix decisions on one page. Enter your name and email and I'll send it right over.
Your information stays private. No spam, no sharing, ever.
Great tutorial thanks so much.
You’re welcome! Glad you liked it.
I should pay more attention to this plugin ✌️ Thanks Graham! Regards from Switzerland ✊