
If you're a singer-songwriter learning Logic, you're not trying to win a plugin collection contest.
You just want your music to sound like you, and sound finished.
That means learning the tools that actually move your songs forward, and skipping the ones that don't.
Here are 7 features worth mastering, and 3 you can skip (for now).
1. Track Stacks
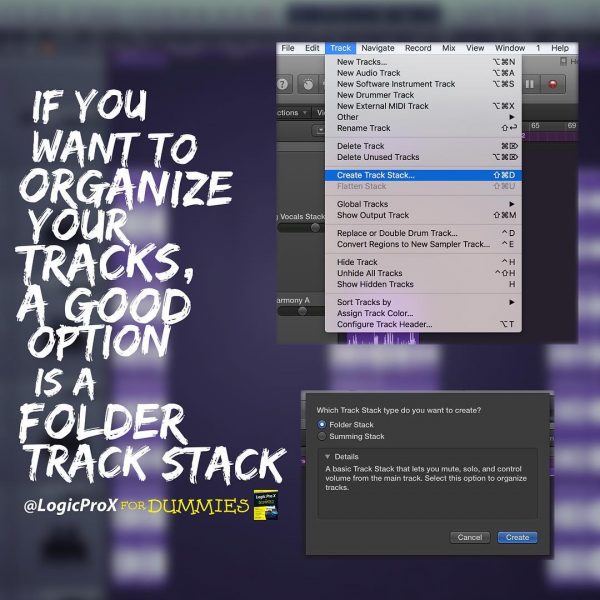
Track Stacks do two jobs: organize and mix.
Use a Folder Stack to keep your session clean. Use a Summing Stack to group vocals or instruments and process them together. For example, you can add reverb to all your background vocals at once by placing them in a stack, the same one-effect-for-the-whole-group efficiency you get from send effects.
To create one, select the tracks you want to group and press Command-Shift-D. Choose Summing Stack. Done.
Use this every time you have more than one track doing a similar job. It'll save you 30 minutes per mix, minimum.
How To Organize Your Logic Pro Projects With Folder Track Stacks
2. Smart Controls
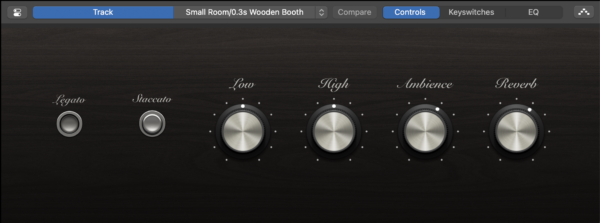
Smart Controls give you a simple interface to tweak the sound of a track without opening five plugin windows.
Use them to adjust your vocal reverb, your guitar tone, or your keyboard's EQ, all in one place. Click the dial icon in the control bar to open Smart Controls.
For a fast setup: Record a vocal. Add Channel EQ and Compressor. Then map their key controls, like the low cut and threshold, to knobs you can control from one screen.
Now you're mixing by feel, straight from one screen.
3. Drummer Track
The Drummer Track writes solid, dynamic drum parts without you touching a MIDI note.
Pick a genre, pick a drummer, and let Logic write a pattern based on your arrangement. You can add fills, simplify patterns, or change the kit.
Use this instead of dragging loops or spending an hour programming beats. If you write with an acoustic guitar or piano, this is your new rhythm section.
Pick "Pop Songwriter" and adjust the feel of an 8-bar region. Loop it while you write the chorus. Done.

4. Take Folders
Every vocal session needs comps. Take Folders make that painless.
Hit record, loop your section, and Logic creates a take folder with every pass. Then swipe to choose your favorite phrases.
No separate tracks, no muted regions, just clean comping that sounds like one great take.
Turn it on in Record > Overlapping Recordings > Create Take Folder. Then loop the chorus and record three takes. Swipe the best lines. You're now faster than most engineers. Once your comp is locked, the natural next step is compressing that vocal so it sits evenly in the mix.
Still struggling to finish songs, even with Logic?
If your sessions feel stuck or scattered, you don't have a DAW problem. You have a songwriting workflow problem.
Speed Songwriting gives you a proven 7-step system to turn ideas into finished songs, fast.
5. Gain Tool in the Region Inspector
A lot of Logic users walk right past this one. You can adjust the gain of audio regions directly, no plugin needed.
"But, Graham, will I be editing the gain in the Inspector all that much? Isn't this an advanced tip...why are you telling me this?"
Fair question. Two reasons:
- I want you to know where the Inspector is (press I)
- I want you to understand how important gain is when recording and mixing audio.
Why Gain Staging Isn’t Optional—3 Quick Fixes to Make Your Mix Cleaner Today
While you're here:
Click an audio region, open the Inspector (press I), and adjust the Gain level in the Region Inspector panel. This controls the level of the region before it hits your plugins.
Use this to balance volume differences between vocal lines. Reach for automation only when you actually want movement. Otherwise, fix the problem at the root.
For example: set all your verses to -2 dB, all your choruses to 0 dB. Now your compressor has less work to do.
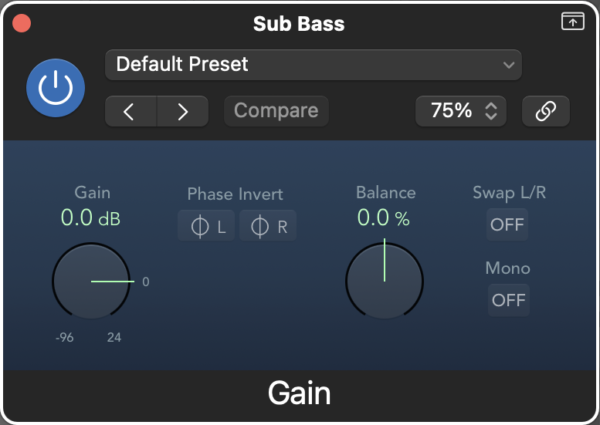
That said, the Gain plugin (Utility > Gain) still sits first and last on my default channel strip setting.
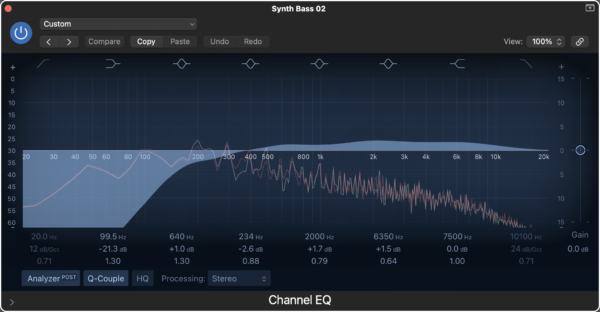
6. Channel EQ Analyzer
Channel EQ does more than cut mud. It shows you exactly what's happening in your sound.
Add Channel EQ to your track and turn on the Analyzer. Sing a note and watch the frequency spike. Play guitar and see where your tone actually lives.
This makes EQ less of a guessing game and more like tracing a shape. When your vocal clashes with your guitar, you'll see the fight.
For example: cut 3 dB at 300 Hz on the guitar and watch the vocal sit better.
Logic Pro Plugins: How To Sculpt Frequencies With Channel EQ
7. Bounce in Place
This saves your CPU and your sanity.
Select a track or region, right-click, and choose Bounce in Place. Logic will render the audio with all its effects.
Use this to freeze a plugin-heavy synth, commit a vocal comp, or lock in timing on a chopped loop.
Bounce your chorus vocals, duplicate the file, reverse it, and tuck it in before the next section. Now your transitions sparkle, with no CPU hit and no lag.
📘 Want a complete Logic Pro walkthrough without the overwhelm?
Logic Pro For Dummies is the best-selling guide trusted by thousands of artists.
Learn only what matters, explained in plain English, with real-world workflows that help you actually make music.
Now for the features you can ignore, at least for now:
1. Surround Panner
Unless you’re mixing film or spatial audio, leave it alone. Stereo is more than enough for powerful records. Don't waste an hour reading about LFE.
2. Environment Window
This one's a deep rabbit hole for MIDI routing nerds. It's powerful, but unless you're doing complex MIDI setups with hardware, skip it. The newer features cover almost everything you need.
3. Sculpture
This synth is cool if you're designing alien bells. But it's confusing, CPU-hungry, and rarely helpful for singer-songwriters focused on organic sounds. Stick with Alchemy or Retro Synth for quick inspiration.
Next Step:
Pick 2 of the 7 features. Use them in your next session. Not all of them. Just 2.
Try Take Folders and Drummer Track on your next song idea. You'll finish more, faster, and actually enjoy it.
🎧 Prefer to learn while you’re on the move?
The Logic Pro For Dummies Audiobook lets you level up your production skills while commuting, walking, or cleaning your studio.
It's like having a Logic coach in your headphones.
Logic Pro For Dummies
The Complete Plain-English Guide to Logic Pro
Written by Graham English — the most accessible and complete Logic Pro reference available. Stop Googling every question and actually understand how Logic works.
See the Book →